Configuring Raspberry Pi OS
Once you are connected to Pirate Node through SSH you must upgrade and configure your Raspberry Pi OS for next steps.
Table of contents
Upgrade OS
If you are not logged into the SSH terminal of your Pirate Node, then first do so:
ssh piratenode@piratenode.local
You will be prompted to enter password. Just type in the password. Note that it might not display any indication on terminal curser movement that you are typing any password character. Just type it in and press ENTER. Once successfully logged into to SSH you will see output something like this:
piratenode@piratenode.local's password:
Linux piratenode.local 6.6.28+rpt-rpi-2712 #1 SMP PREEMPT Debian 1:6.6.28-1+rpt1 (2024-04-22) aarch64

The programs included with the Debian GNU/Linux system are free software;
the exact distribution terms for each program are described in the
individual files in /usr/share/doc/*/copyright.

Debian GNU/Linux comes with ABSOLUTELY NO WARRANTY, to the extent
permitted by applicable law.
Last login: Fri May 17 13:30:35 2024 from 192.168.1.111
piratenode@piratenode:~ $
Next run the following command:
sudo apt update
You will see some output like the following:
piratenode@piratenode:~ $ sudo apt update
Hit:1 http://deb.debian.org/debian bookworm InRelease
Get:2 http://deb.debian.org/debian-security bookworm-security InRelease [48.0 kB]
Get:3 http://deb.debian.org/debian bookworm-updates InRelease [55.4 kB]
Get:4 http://deb.debian.org/debian-security bookworm-security/main arm64 Packages [153 kB]
Get:5 http://deb.debian.org/debian-security bookworm-security/main armhf Packages [150 kB]
Get:6 http://archive.raspberrypi.com/debian bookworm InRelease [23.6 kB]
Hit:7 https://ngrok-agent.s3.amazonaws.com buster InRelease
Get:8 http://archive.raspberrypi.com/debian bookworm/main armhf Packages [422 kB]
Get:9 http://archive.raspberrypi.com/debian bookworm/main arm64 Packages [413 kB]
Fetched 1,266 kB in 3s (390 kB/s)
Reading package lists... Done
Building dependency tree... Done
Reading state information... Done
Now execute the upgrade command:
sudo apt upgrade -y
This will install/upgrade the OS without prompting you any question. If your OS is already upgraded, it might show output like this:
$ sudo apt upgrade -y
Reading package lists... Done
Building dependency tree... Done
Reading state information... Done
Calculating upgrade... Done
0 upgraded, 0 newly installed, 0 to remove and 0 not upgraded.
If it did install any upgrades it’s best to reboot your Pirate Node with the following command:
sudo reboot
This will immediately disconnect you from your SSH session and reboot the device.
Just wait for about 2-3 minutes and try connecting to your Pirate Node’s SSH terminal again for next steps.
Install required software
Once your Raspberry Pi device is back up again, login back to it’s SSH terminal to install some packages in adavnce that we will need further in this guide.
Use the following two commands:
sudo apt update
sudo apt install git htop -y
This should install the required software without prompting you. That’s it for this part.
Update SWAP Memory Size
Bascially SWAP memory is usefull on your disk in case the RAM gets full.
Just like before connect to the SSH terminal of your Pirate Node:
ssh piratenode@piratenode.local
Once connected you will need to edit the file /etc/dphys-swapfile using command line and keyboard shortcuts. No matter how much you might have heard or feel it’s too much difficult to use Linux or an OS through command line, You can do it! It is not too much if you are willing to read and follow the instructions.

Run the following command in SSH terminal:
sudo nano /etc/dphys-swapfile
You will see and command line text editor. Just like in the following screen shot:
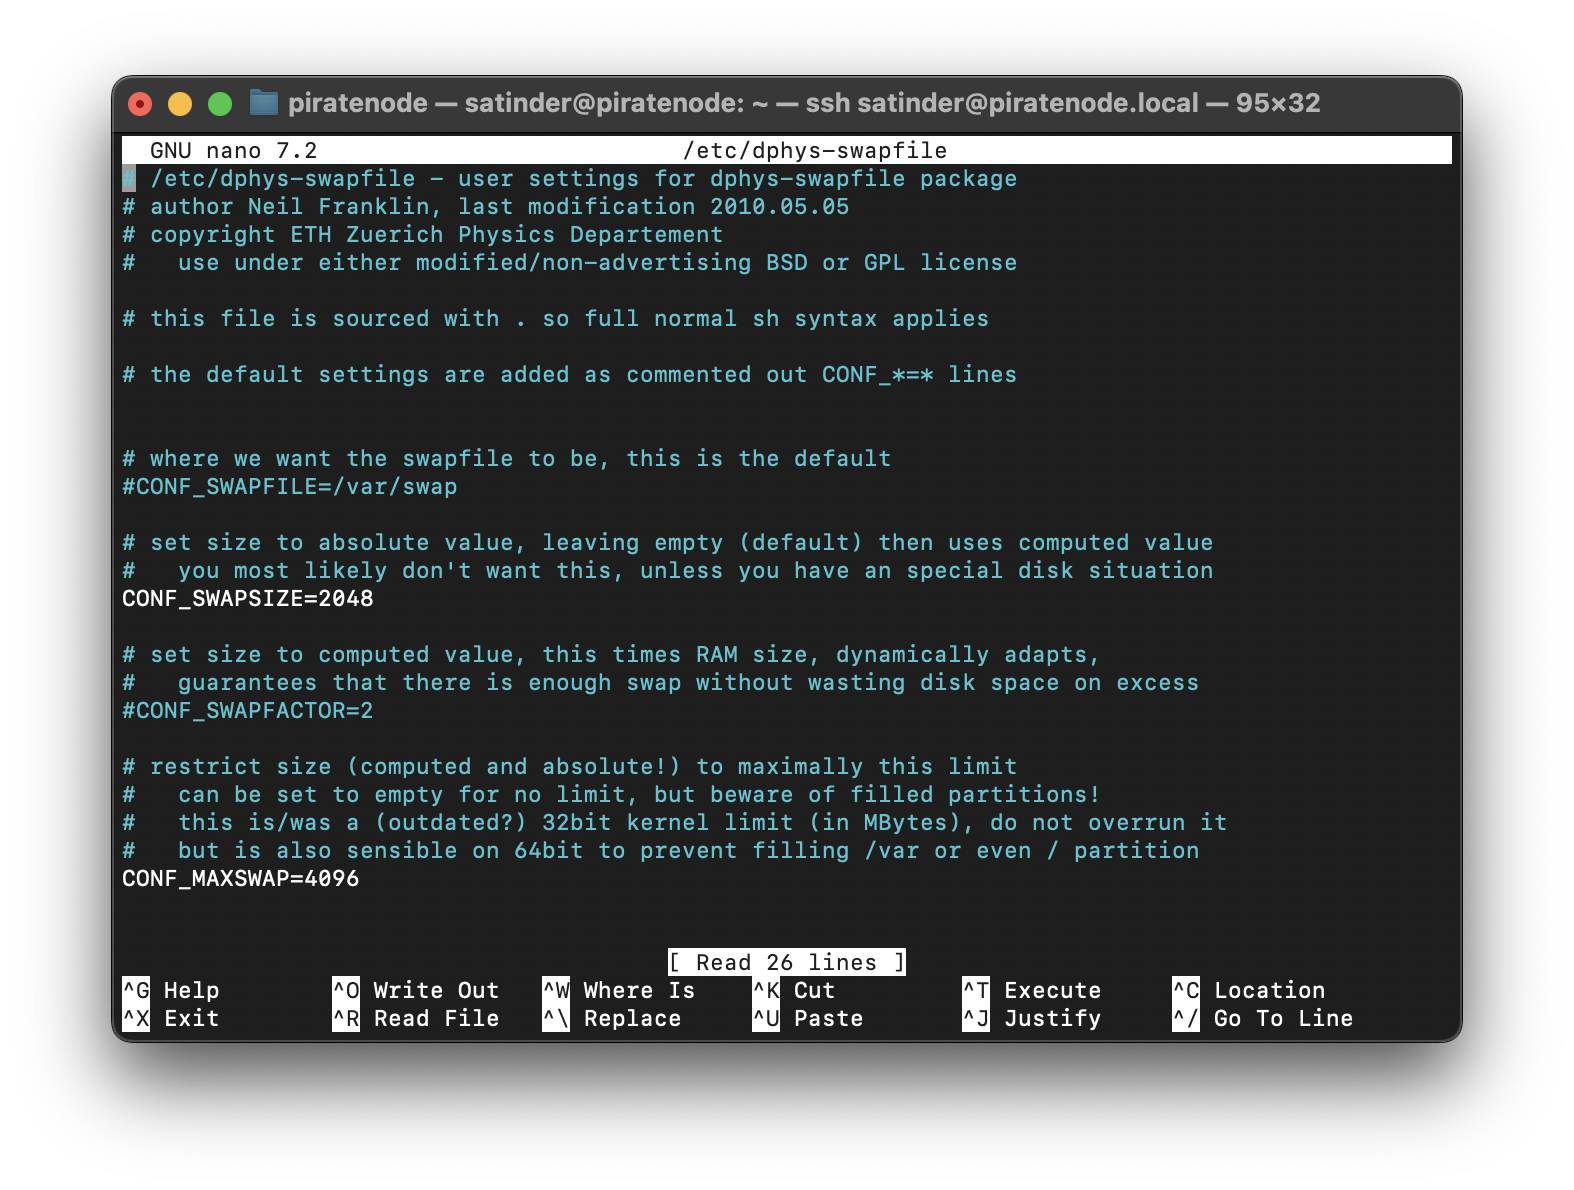
Now use arrow keys on your keyboard to move the cursor. And change the following two lines to match them exactly:
CONF_SWAPSIZE=2048
CONF_MAXSWAP=4096
In any case you feel something went wrong, then check the screen shot text against your file’s. Make the relevant changes and save again.
To save you use keyboard shortcuts.:
- Step 1 -
CTRL + O: Initiate the save file action. - Step 2 -
ENTER: Writes the changes to file. Saves the updates to file. - Step 3 -
CTRL + X: Exits the text file editor.
Ideally, upon step 3, you will not get any prompt and just exit back to the SSH terminal.
When you press CTRL + X and you get prompted with question Save modified buffer? and either to press Y or N for Yes/No, that means you possibly typed something in file which is not saved to the file.
If you are unsure about the changes, just type N and do not save the updates. After that, open the file again as per the steps above and save the updates.
You can also compare your text file with the screen shot in this guide, and fix it if you feel something is out of place.
You can check the content of the updated /etc/dphys-swapfile file with following command:
cat /etc/dphys-swapfile
It will just print the output of the whole file on your command line. It is not a text-edit command, just to read the file. If your changes are saved in it they will refelect in the output.
Once confirmed of the updates made to /etc/dphys-swapfile file, run the following command in your SSH terminal:
sudo systemctl restart dphys-swapfile.service
This will restart the SWAP memory manager service, and should update the size of the swap memory.
To check if the changes are reflecting in the OS, you can run this command:
free -m
The output will be something like this:
               total        used        free      shared  buff/cache   available
Mem:            8052        2343         155           5        5655        5708
Swap:           2047           0        2047
If total under Swap: is equals to 2047 or more then it is refelecting it must.
Another way to check is to use the following command:
htop
This will run the command line application as showing in the screen-shot next:
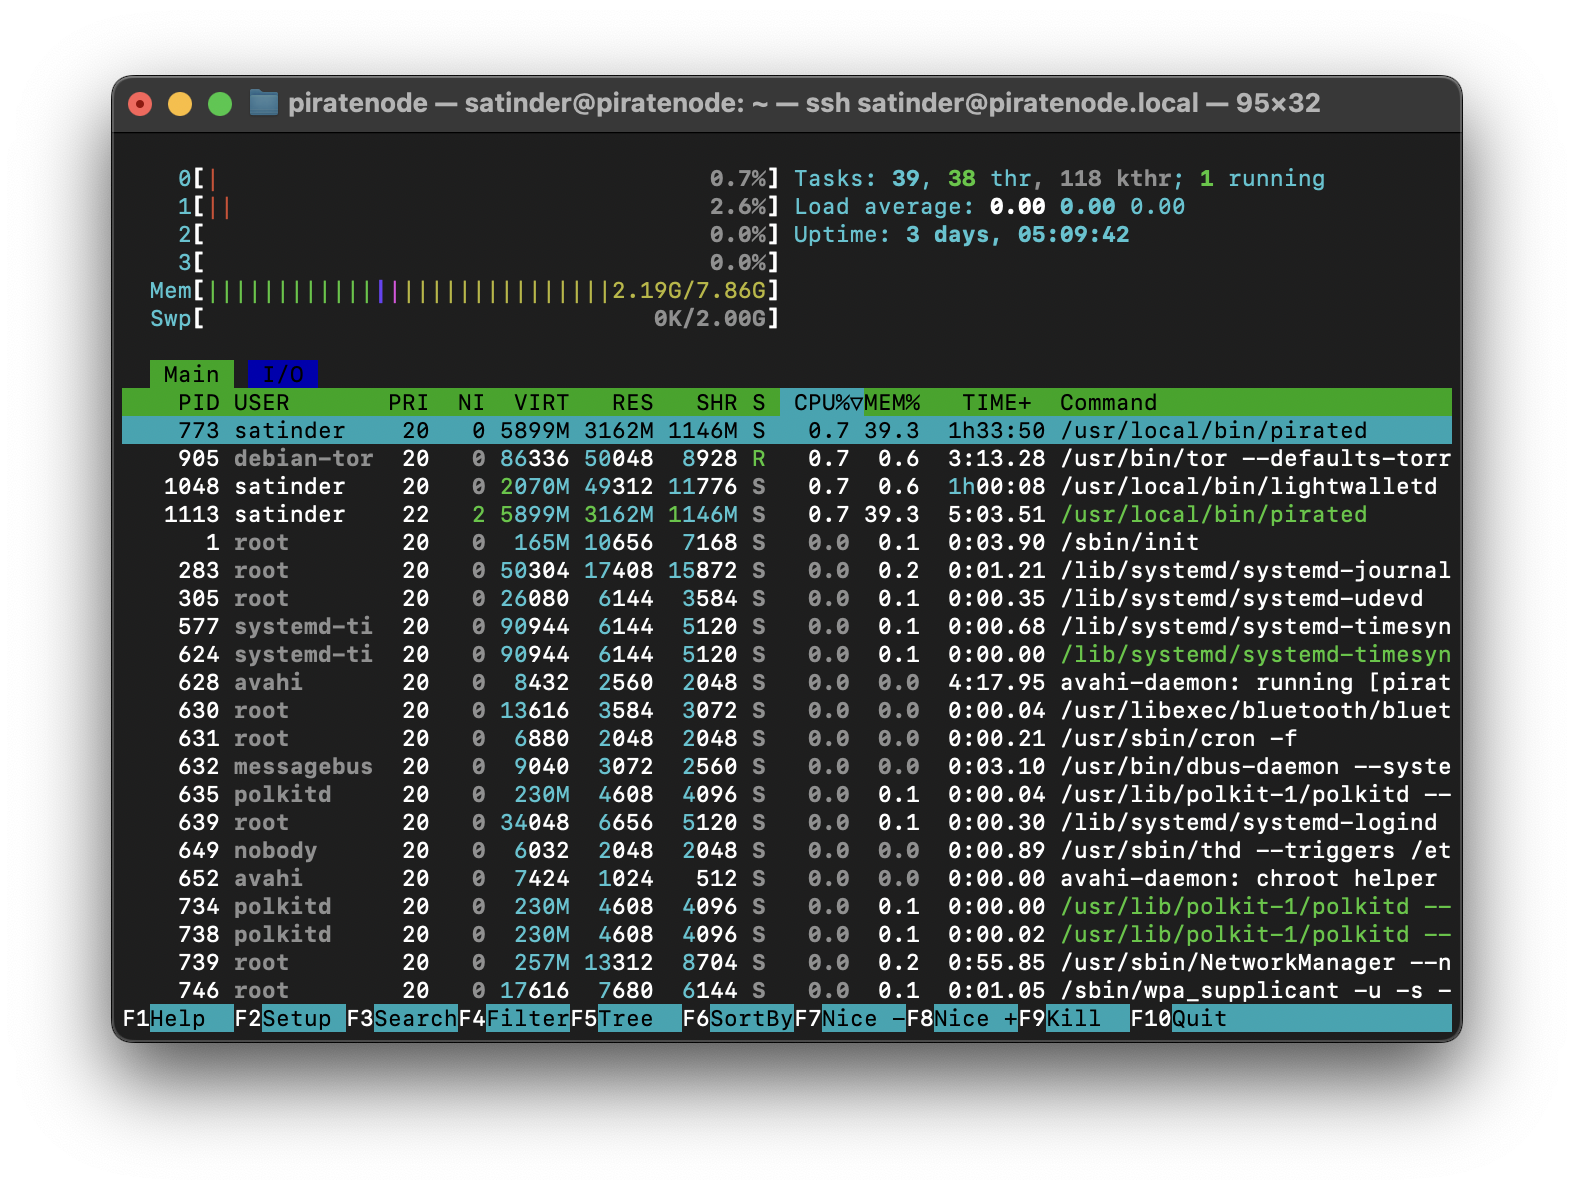
To exit from this application, jus press Q key on your keyboard.
In this application you can see how much your system’s CPU, RAM and SWAP memory is in use and what is the size of theirs.
According to the screen-shot 2.19 GB of RAM is in use out of 7.86 GB of RAM on the Pirate Node device.
And 0 KB of SWAP memory is in use out of 2 GB available.
Configure WiFi
It is possible that when you created the microSD card with Raspberry Pi OS, and used the OS Customisation part to configure WiFi setting it still did not work as intended.
That is why you MUST use Ethernet LAN cable as a backup to connect your Raspberry Pi device with the network.
But a working WiFi for your Pirate Node would be much helpful. For one you won’t has to keep it plugged into a LAN cable, which means less mess of cables around. Another is that you can just plug your Raspberry Pi device anywhere and leave it running without needing a LAN cable accesible, and still be accessible over the network.
To check if your Raspberry Pi device is connected to WiFi network and it has an IP assigned to it use the following command:
iwconfig
It will give something like this in output:
$ iwconfig
lo        no wireless extensions.

eth0      no wireless extensions.

wlan0     IEEE 802.11  ESSID:"MY_WIFI"
          Mode:Managed  Frequency:2.442 GHz  Access Point: E8:9C:25:18:F1:8E
          Bit Rate=24 Mb/s   Tx-Power=31 dBm
          Retry short limit:7   RTS thr:off   Fragment thr:off
          Power Management:on
          Link Quality=68/70  Signal level=-42 dBm
          Rx invalid nwid:0  Rx invalid crypt:0  Rx invalid frag:0
          Tx excessive retries:285  Invalid misc:0   Missed beacon:0
Under section wlan0 if you see your WiFi’s name/SSID showing under ESSID: value, that means your device is already connected successfully to your WiFi.
You can also check your device’s IP address connected through WiFi with this command:
ifconfig
It will print something like this:
piratenode@piratenode:~ $ ifconfig
eth0: flags=4163<UP,BROADCAST,RUNNING,MULTICAST>  mtu 1500
        inet 192.168.1.45  netmask 255.255.255.0  broadcast 192.168.1.255
        inet6 fdf1::0000  prefixlen 64  scopeid 0x0<global>
        inet6 fe80::0000  prefixlen 64  scopeid 0x20<link>
        ether 00:00:00:00:00:00  txqueuelen 1000  (Ethernet)
        RX packets 7056021  bytes 1952296466 (1.8 GiB)
        RX errors 0  dropped 1045  overruns 0  frame 0
        TX packets 504438  bytes 228657936 (218.0 MiB)
        TX errors 0  dropped 0 overruns 0  carrier 0  collisions 0
        device interrupt 107

lo: flags=73<UP,LOOPBACK,RUNNING>  mtu 65536
        inet 127.0.0.1  netmask 255.0.0.0
        inet6 ::1  prefixlen 128  scopeid 0x10<host>
        loop  txqueuelen 1000  (Local Loopback)
        RX packets 86497081  bytes 66400008381 (61.8 GiB)
        RX errors 0  dropped 0  overruns 0  frame 0
        TX packets 86497081  bytes 66400008381 (61.8 GiB)
        TX errors 0  dropped 0 overruns 0  carrier 0  collisions 0

wlan0: flags=4163<UP,BROADCAST,RUNNING,MULTICAST>  mtu 1500
        inet 192.168.1.55  netmask 255.255.255.0  broadcast 192.168.50.255
        inet6 fe80::0000  prefixlen 64  scopeid 0x20<link>
        ether 00:00:00:00:00:00  txqueuelen 1000  (Ethernet)
        RX packets 9406  bytes 2426192 (2.3 MiB)
        RX errors 0  dropped 1  overruns 0  frame 0
        TX packets 1130  bytes 88976 (86.8 KiB)
        TX errors 0  dropped 0 overruns 0  carrier 0  collisions 0

piratenode@piratenode:~ $
Just check for the section wlan0 and line start with inet. Example:
inet 192.168.1.55 netmask 255.255.255.0 broadcast 192.168.50.255
The value for inet is the IP address.
If this is the case, you don’t need to anything further in this part of the guide. You are all set.
If above is not looking anything in your system, then you need to setup your WiFi settings. For that execute the following command in your SSH terminal:
sudo raspi-config
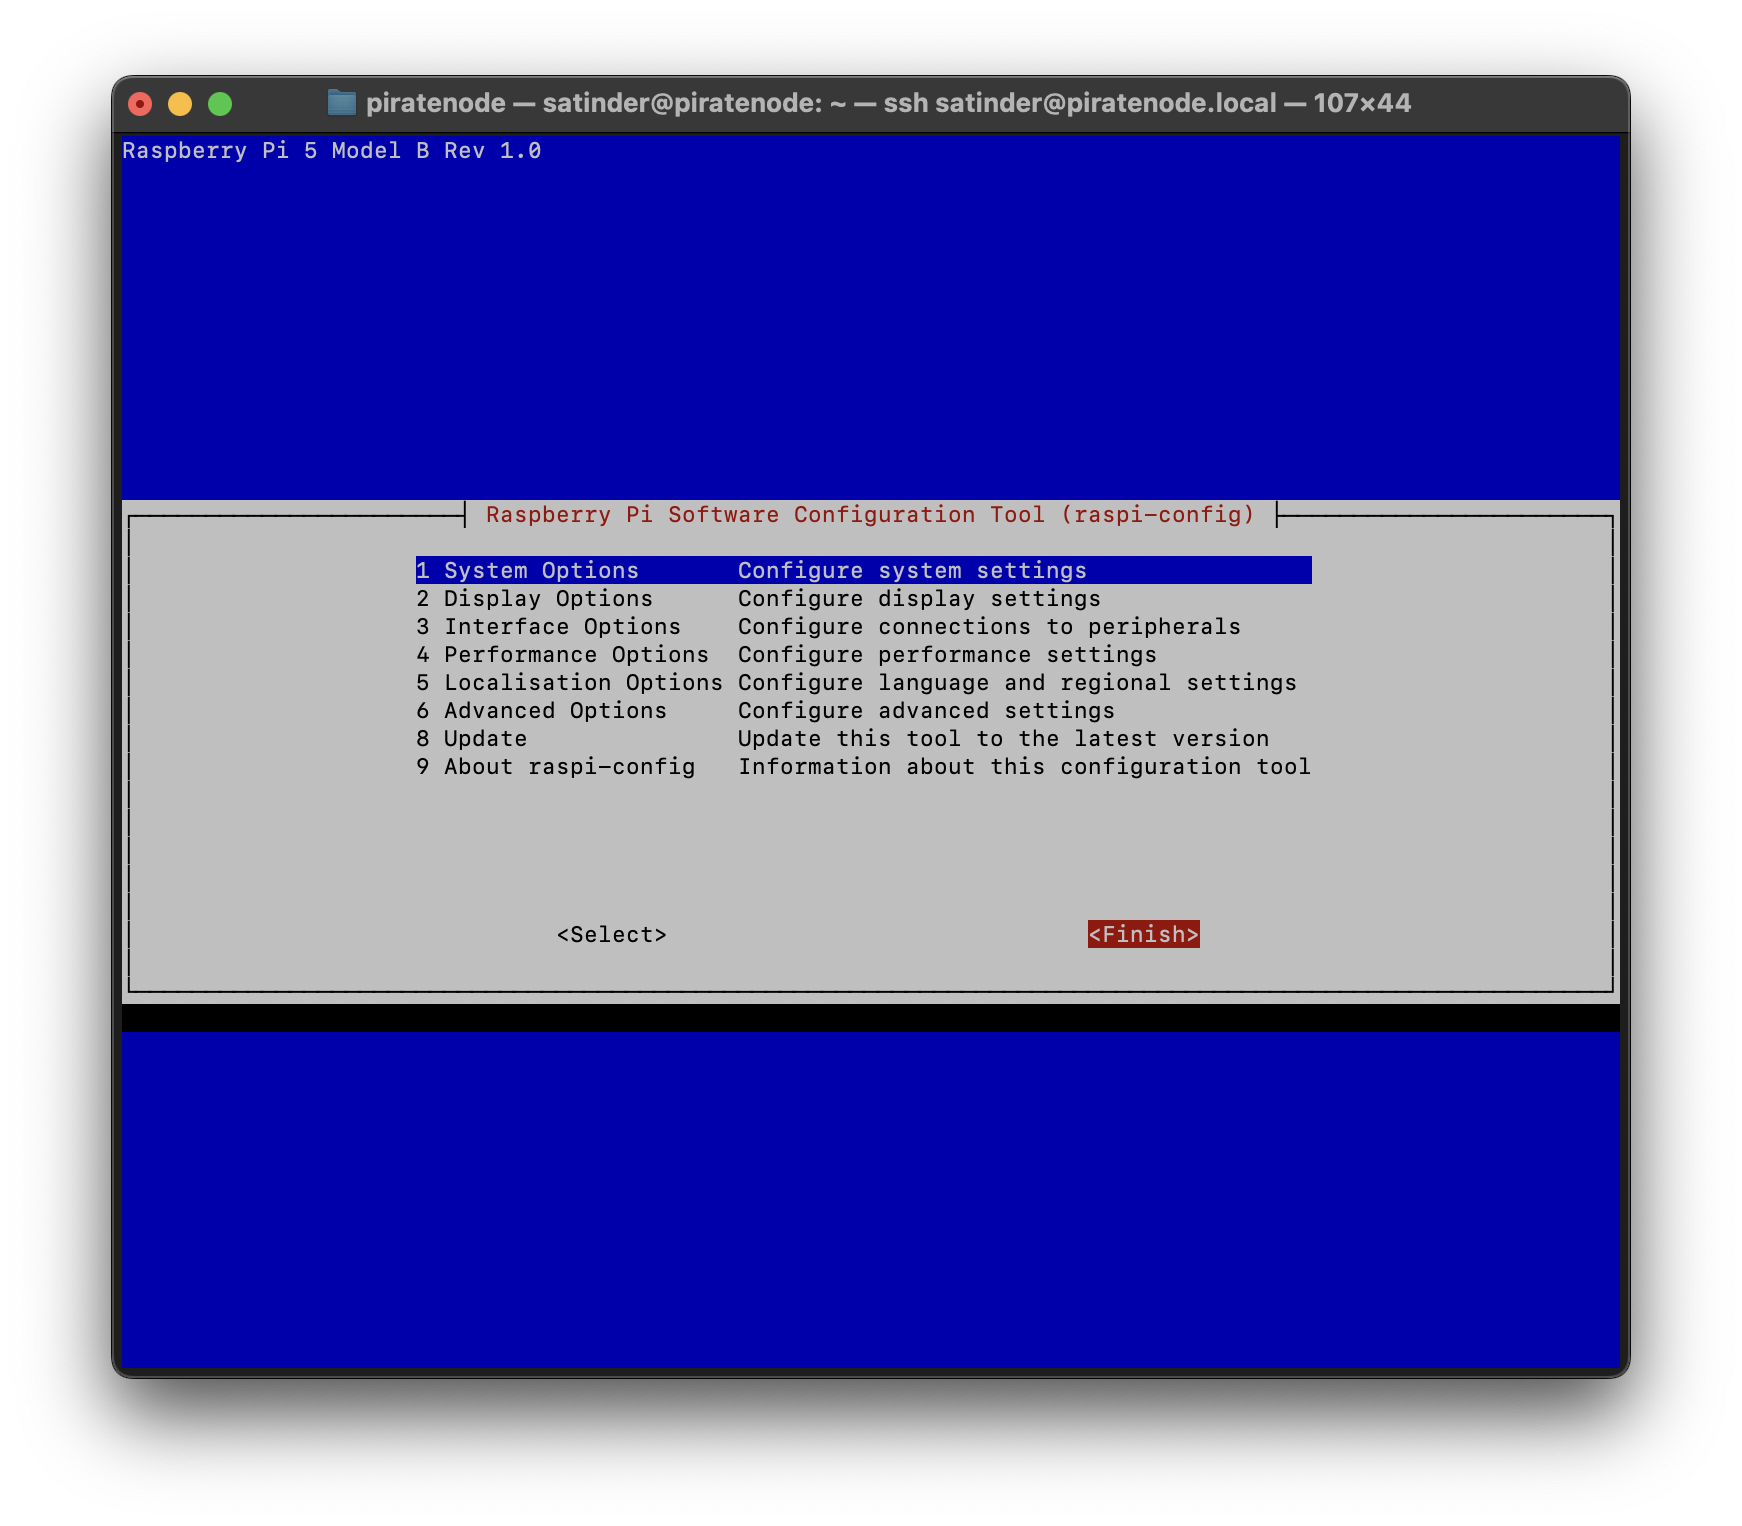
This will start a command line application for configurating Raspberry Pi device. Just like in the screen-shot:
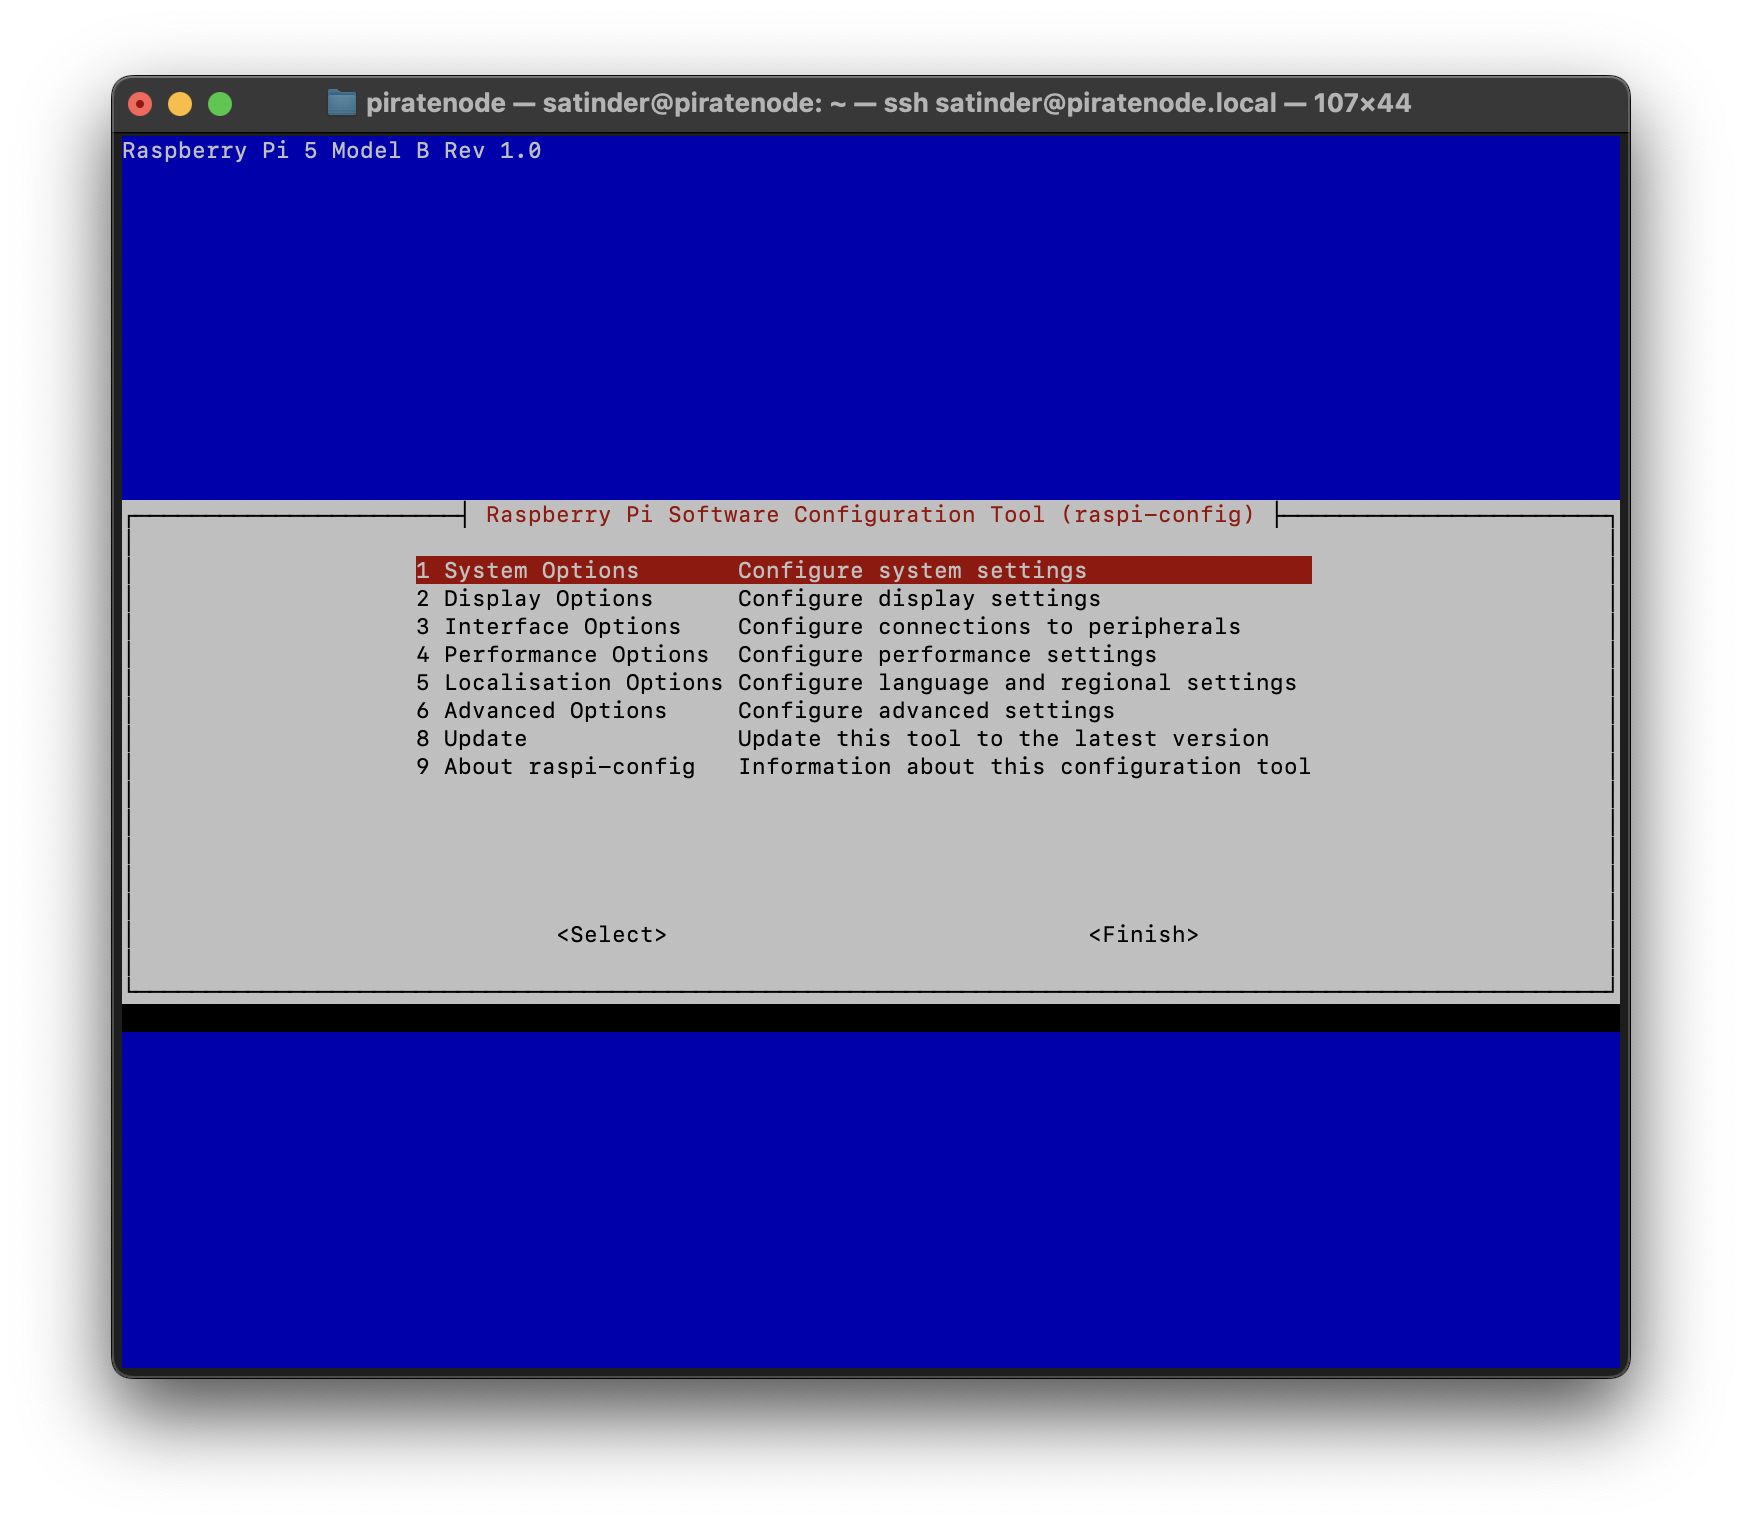
You can use the arrow keys to navigate around the options in this command line Raspberry Pi configuraiton application. Just select the 1. System Options and press ENTER on your keyboard. You will see the next screen as per the next screen-shot:
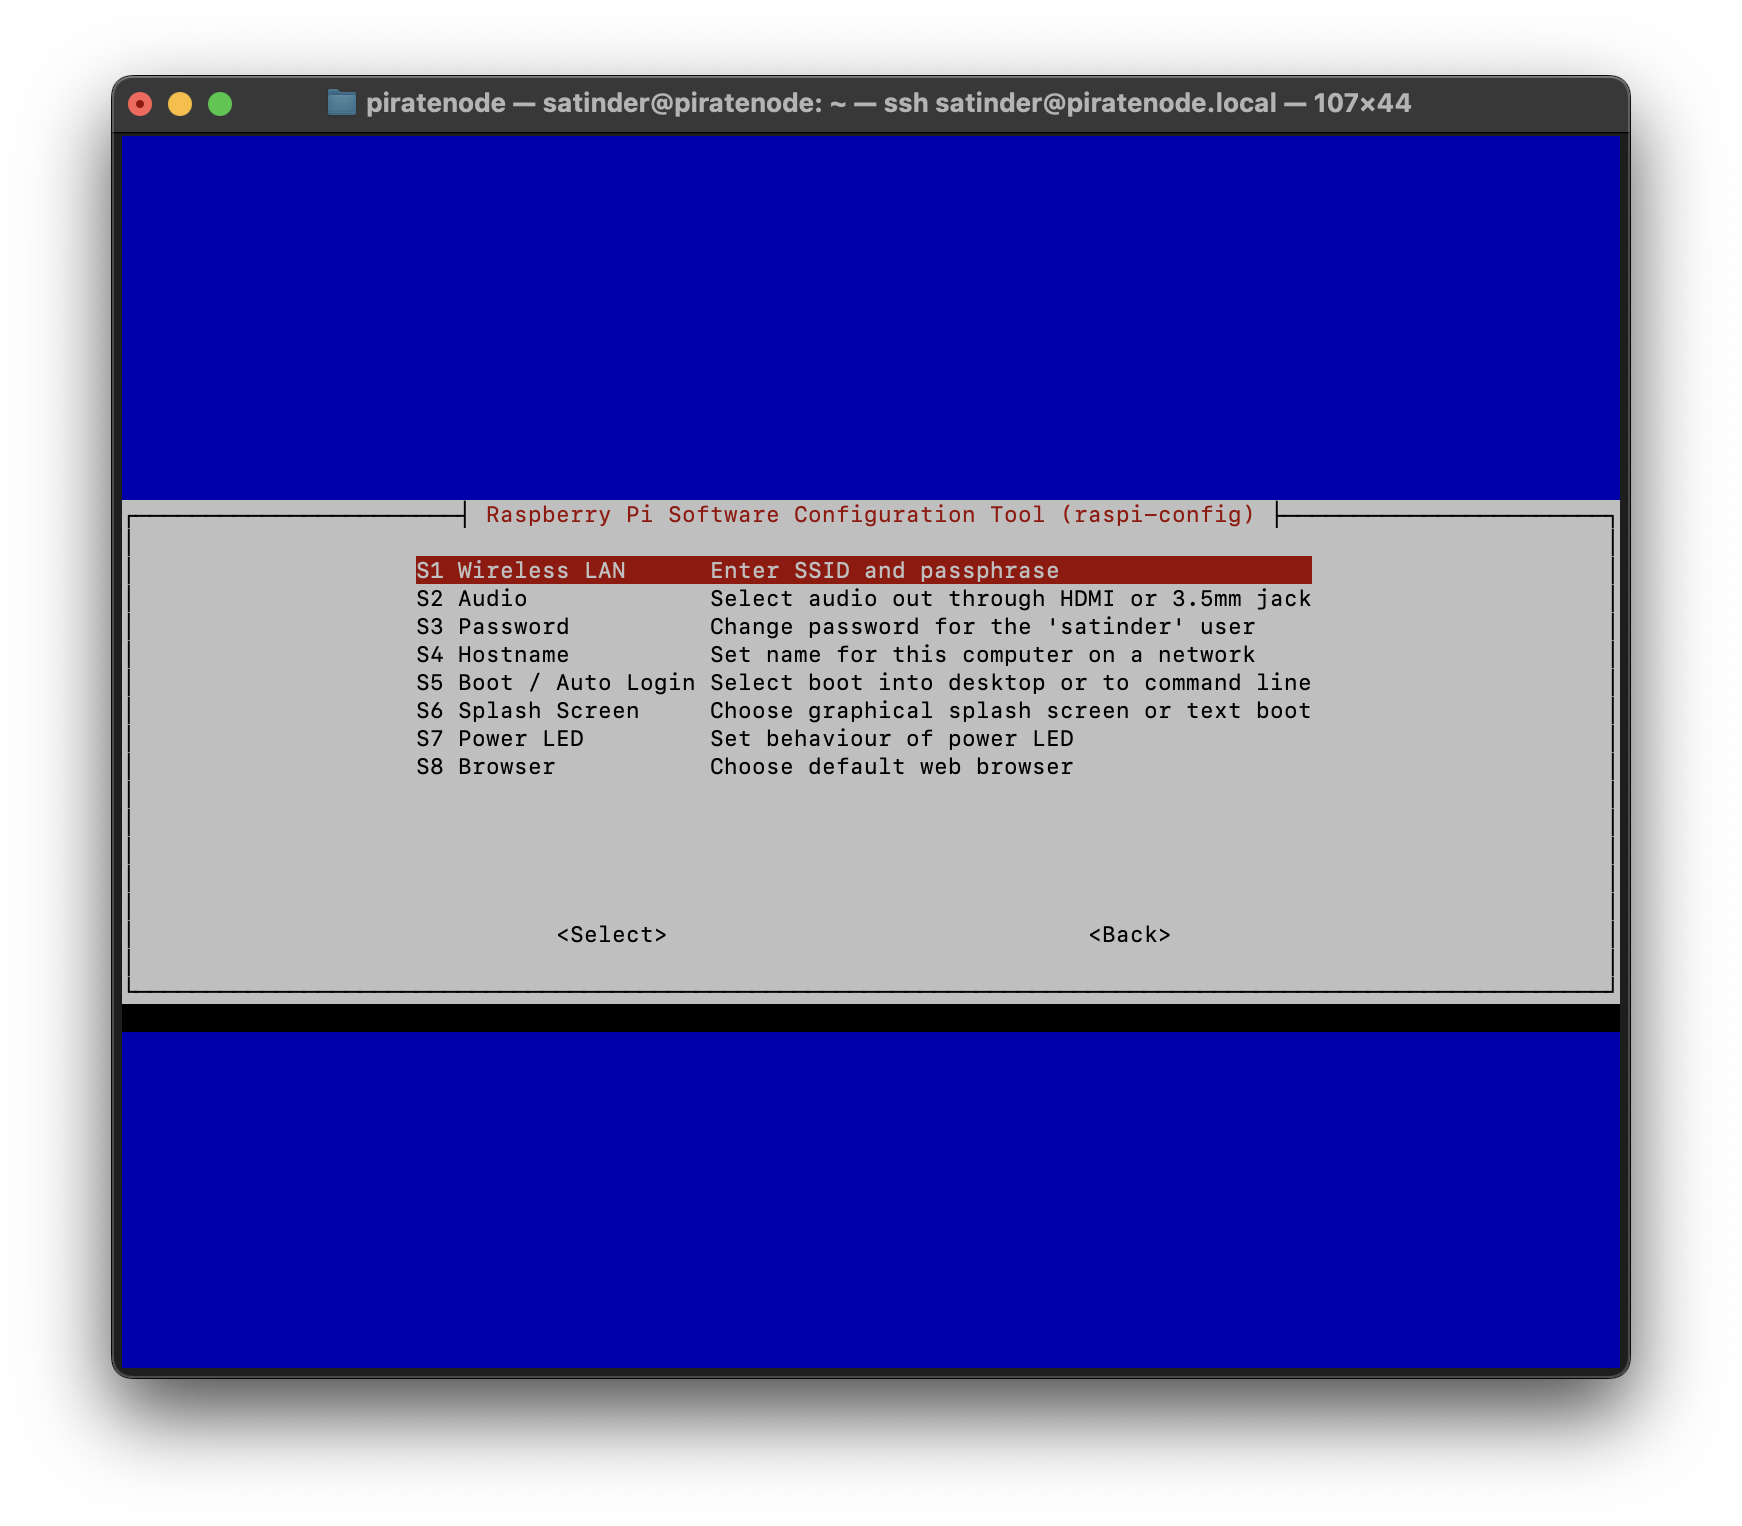
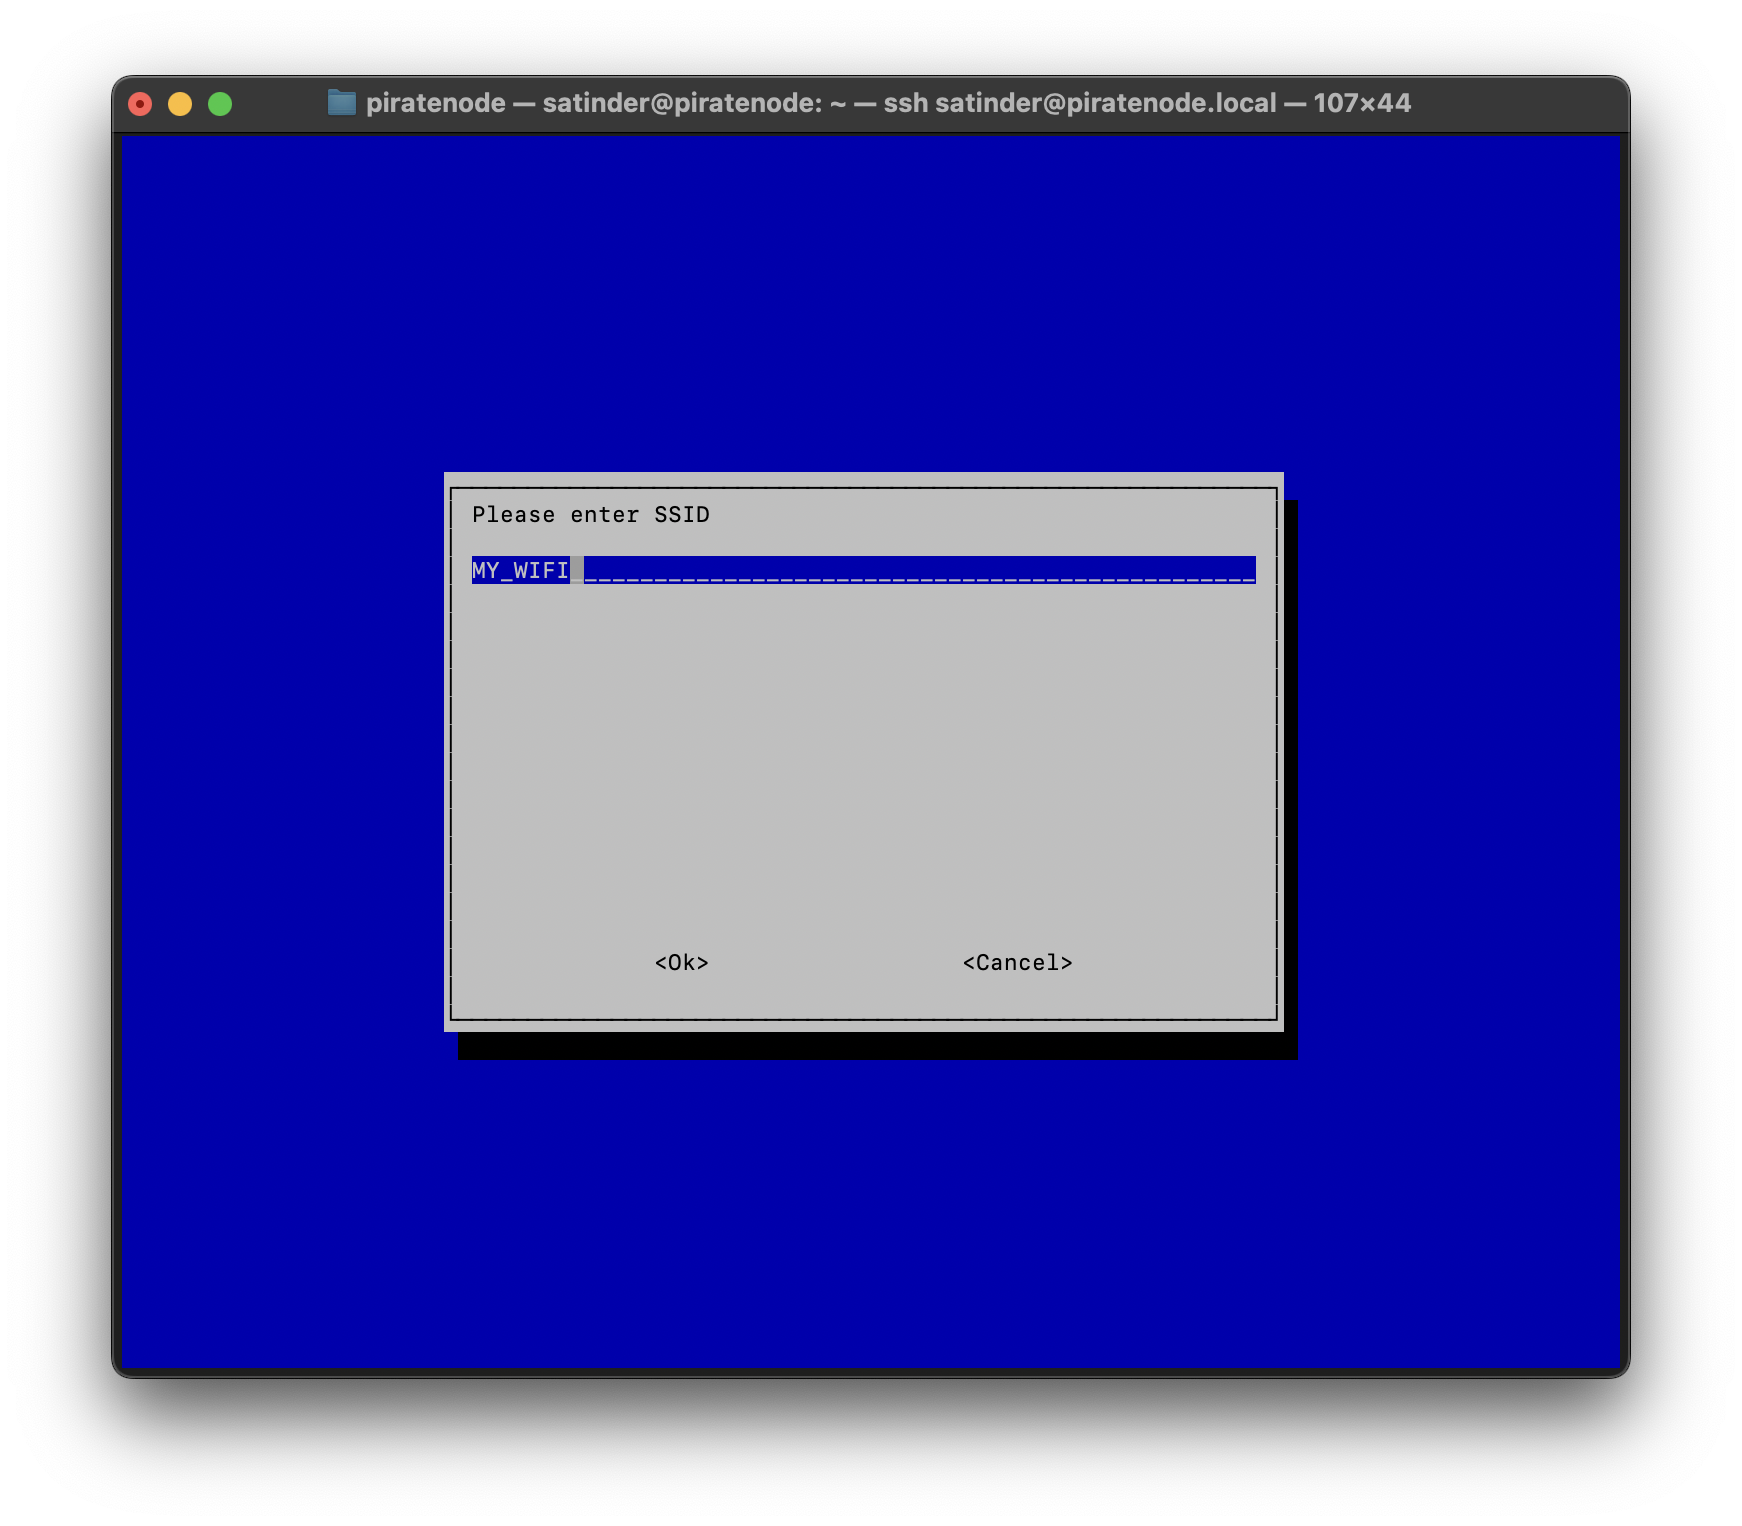
Select option S1 Wireless LAN and press ENTER. Then on next screen enter your WiFi name, the SSID exactly it is named. the SSID is case sensitive, so it MUST match the name of your SSID. Example, if your WiFI SSID is My_WiFi but your either put MY_WIFI or my_wifi it will fail to connect to it. As per this example it MUST be enered exact as My_WiFi.
After entering the SSID, press ENTER and go to next screen. There enter your WiFi’s password.
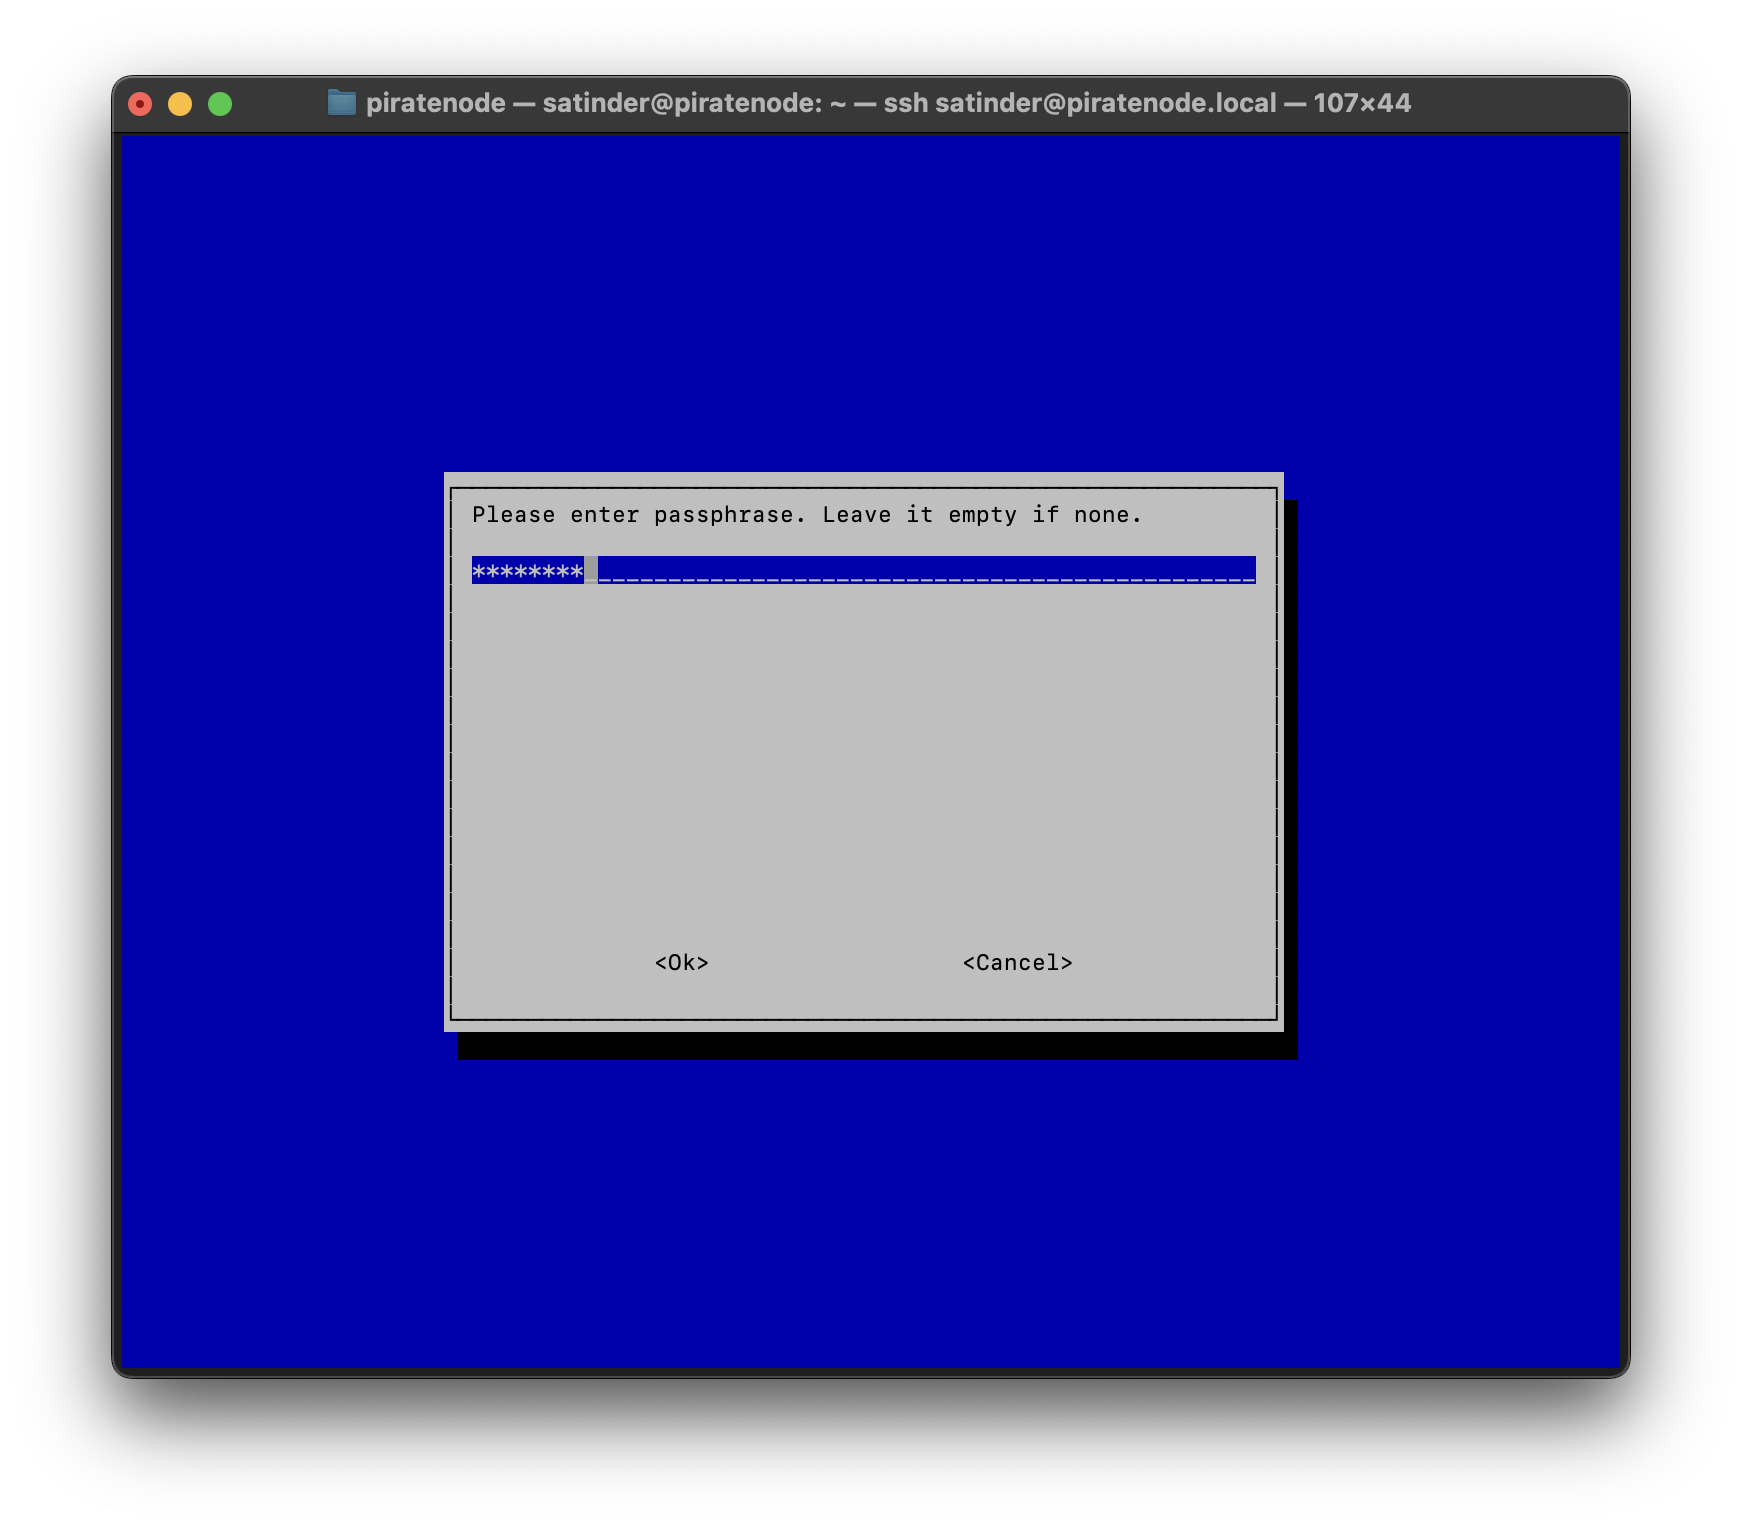
Once WiFI password is entered, press ENTER on your keybaord. The system will try to connect to the WiFi. While it is trying to connect to your WiFi, it will be showing back the command prompt like this:

Wait for the process to finish.
If Raspberry Pi device succssfully connected to the WiFi, you will see the screen you were greeted with the first time.
On this screen use the right arrow keys to navigate to <Finish> button and press ENTER on your keyboard to exit the application.
If there’s something wrong, you might see error like the following screen-shot:
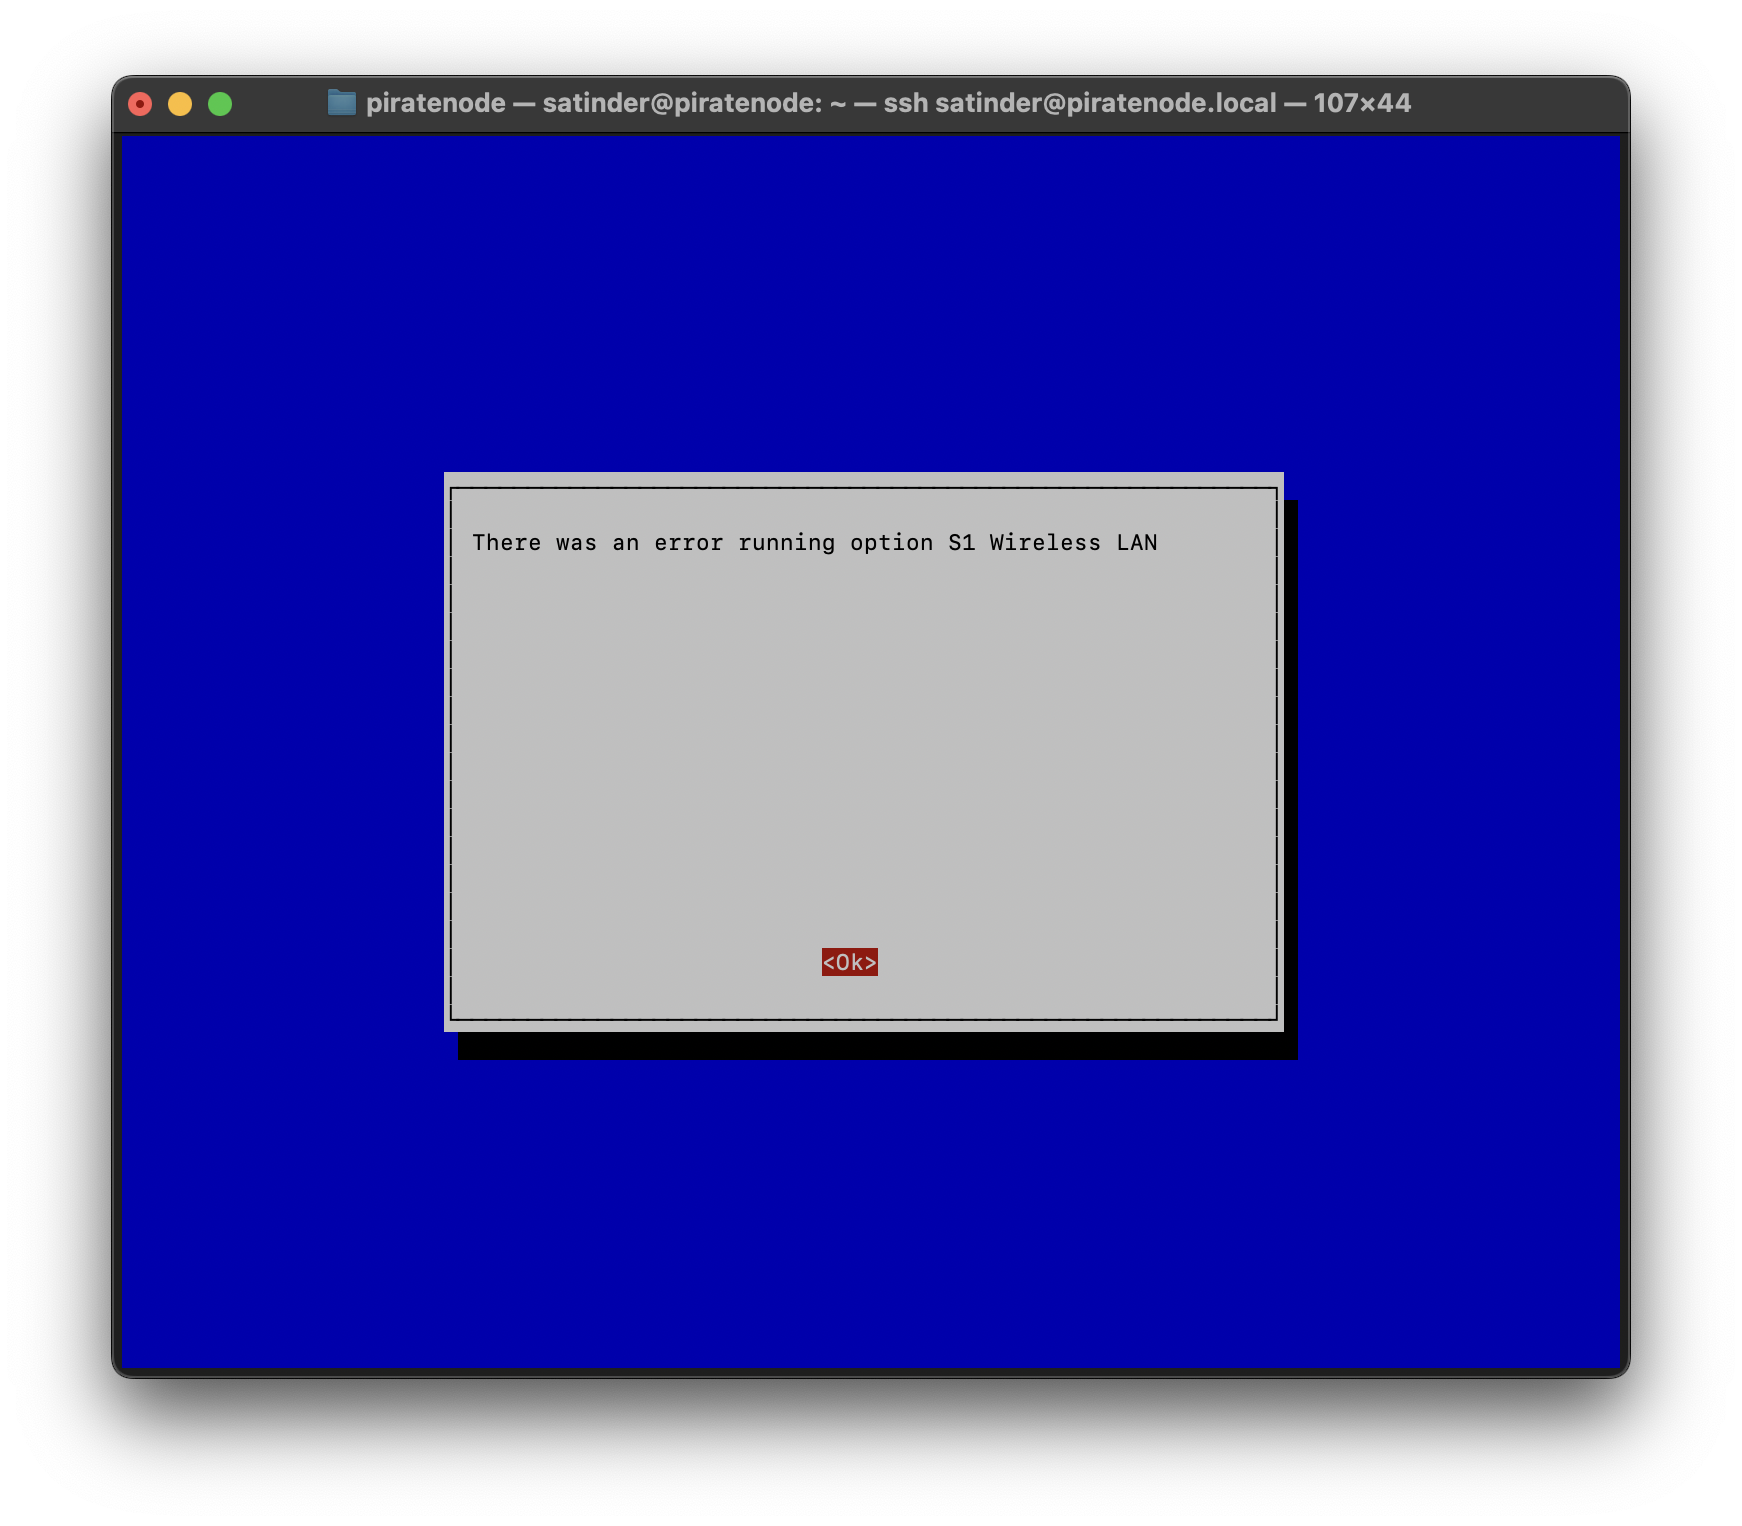
In this case, you can either try entering the WiFI details again to see if that fixes the issue, or maybe try using different WiFi option if you have.
If none of that works, then just keep using the Ethernet LAN cable.